
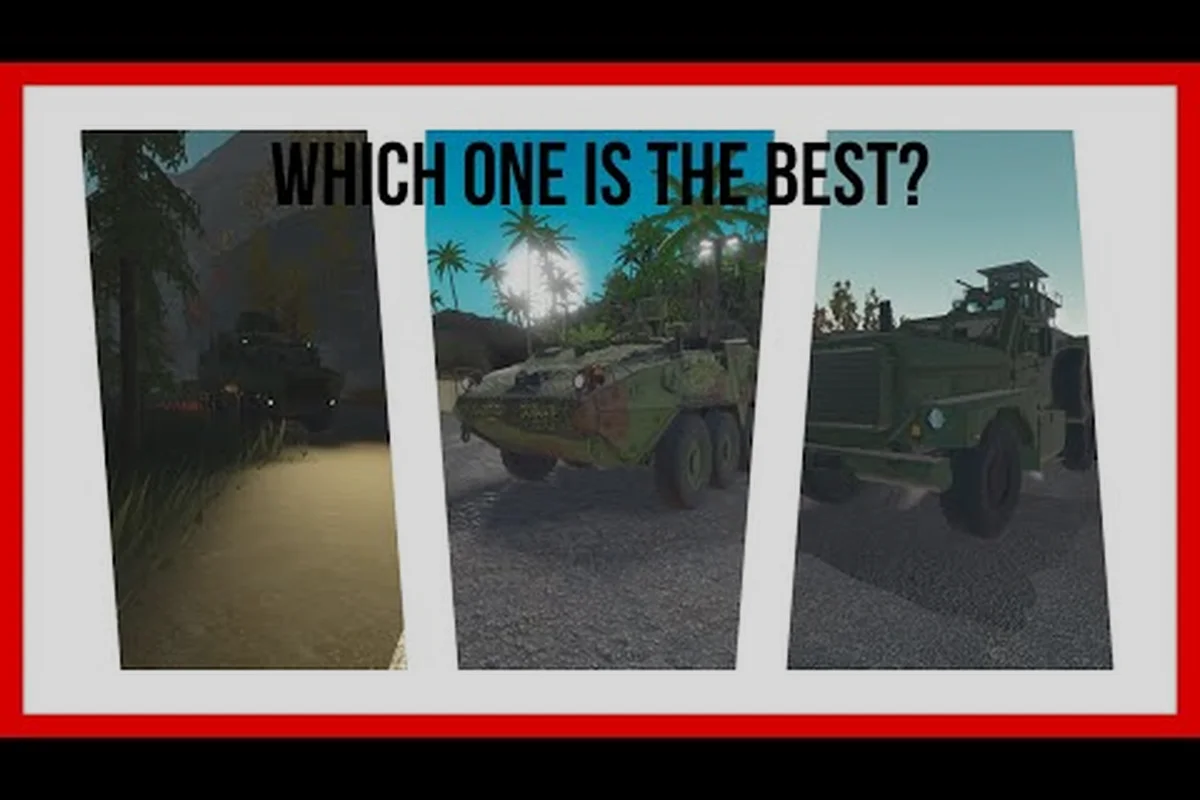
The brm5 Stryker sits in a strange middle ground between a logistics truck and a light combat vehicle, which is exactly why a focused brm5 Stryker guide is worth your time. In Blackhawk Rescue Mission 5, rolling an armored personnel carrier into a hot zone feels different from driving a humvee or a wheeled technical because the Stryker's crew-served gunner seat turns every sortie into a mobile weapons platform. The catch: most pilots burn through ammo, run dry on fuel, and wonder why their XP curve is flat. This guide maps crew roles, gunner seat XP routes, and the tactics that keep the APC alive long enough to feel worth the price tag.
For the authoritative reference, the official Roblox page keeps the complete details: the official PLATINUM FIVE Roblox group for brm5-stryker-guide.
Stryker Overview and Why Crew Setup Matters
The Stryker is an eight-wheeled APC in the same rough weight class as the brm5 humvee, but the comparison ends at armor. Where a humvee is really a fast gun truck, the Stryker is built around its turret: a stabilized remote gun position that can lay sustained fire on AI threats while the driver focuses on movement. That single design choice changes how you should approach buying, crewing, and deploying the vehicle.
Vehicle Class and Combat Role
Think of the Stryker as a rolling overwatch platform rather than a transport. It carries two to three crew members comfortably, and the gunner seat is the entire point of the platform. Without a gunner active, the Stryker degrades into a sluggish humvee with extra armor plating and worse fuel economy. With a gunner active, it becomes the most efficient XP-printing ground vehicle in the mid-game because turret kills credit the gunner for full XP regardless of who drove the vehicle into position.
| Role | Stryker | Humvee | Technical |
|---|---|---|---|
| Primary job | Gun truck / XP farm | Fast recon / light transport | Anti-infantry brawler |
| Crew seats (driver + gunner + passenger) | 1 + 1 + 1 | 1 + 1 | 1 + 0 |
| Stabilized turret | Yes | No | No |
| Off-road handling | High | Medium | Low |
| Typical use case | Sustained AI farm, base defense | Quick response, scouting | Infantry suppression |
Why the Crew Seat Setup Is Non-Negotiable
Community data from the player-run Discord suggests crews that rotate a dedicated gunner earn roughly 2.3x more XP per sortie than solo pilots who hop in and out of the seat. The reason is straightforward: turret kills generate XP the moment the trigger is pulled, and switching seats resets the reload animation. A three-person crew running a Stryker for one hour can clear outposts faster than a solo humvee driver, simply because the gunner never has to reload, refuel, and reposition at the same time.
With a buddy in the gunner seat, the Stryker turns into the fastest brm5 grinding setup in the current BRM5 patch, since turret kills and driver road kills feed the same XP multiplier without a reload penalty; running solo instead drops you onto the slower humvee and Sea Stallion rotations covered below, where the goal is just keeping the XP curve from flatlining before you can queue up a real crew.
Crew Roles, Seating Order, and the Gunner XP Route
Every Stryker run lives or dies on how the three seats are filled, and the seat order directly governs which repair kit and ammo crate are pulled first when the vehicle stops. The driver is straightforward, but the gunner seat multiplies XP gain on every kill credited to the mounted .50 cal or Mk 19, while the passenger seat decides who can throw smoke, spot infantry through thermals, and re-supply the driver mid-sprint. Swapping gunner and passenger between a repair-focused teammate and an XP-focused teammate is what separates a one-vehicle grind from a squad that churns through two or three Strykers per match on the brm5 stryker guide pacing.
Driver, Gunner, and Passenger Responsibilities
The driver is responsible for route planning and vehicle survival. The Stryker handles better than most wheeled APCs in the game, but its turning radius is wider than the humvee's, and it cannot reverse out of a stuck position on steep slopes. A driver who learns the map's hard-cover corridors will keep the turret pointed at targets for longer stretches without taking return fire.
The gunner is the XP engine. Every AI kill from the turret logs against the gunner's progression, which is why a dedicated gunner with a high-velocity weapon loadout is the standard competitive setup. Passengers can also fire personal weapons from the side hatches, but those kills are split between the passenger's weapon XP and the gunner's vehicle XP, so the math is messier.
The passenger is the unsung logistics role. They handle ammo resupply, repair the vehicle when it takes critical damage, and bail out to clear nearby infantry that close the distance. In a two-person crew, the passenger doubles as the on-call gunner if the primary seat gets knocked offline.
Seating Order Cheat Sheet
| Seat | Best kit | Primary duty | XP earned |
|---|---|---|---|
| Driver | Standard rifle, no scope | Route + survival | Minimal |
| Gunner | High-cap LMG or SAW, armor-piercing rounds | Sustained fire | High (turret kills) |
| Passenger | SMG or shotgun for close defense | Resupply + repair + anti-infantry | Variable |
Solo Crew: How to Keep the XP Route Alive
Without a second player, the Stryker drops to a single turret, but the gunner seat is still the most XP-efficient solo vehicle in the game. The trick is to park the Stryker at a hard-cover overlook, lock the turret onto a chokepoint, and let AI patrols walk into the killzone. The player then exits, clears any infantry that close the distance on foot, and returns to the gunner seat before the next patrol spawns.
Reported by players, the gunner seat XP route works best near the southern airfield and the coastal radar station because both areas spawn light vehicle patrols in predictable arcs. Each cycle takes about six to eight minutes, and a solo gunner can clear three to four patrols before needing to refuel.
Buying, Fueling, and Repairing the Stryker
Money, fuel, and repair bills are where most Stryker pilots give up on the vehicle. The buy-in is steep, the fuel consumption is brutal, and a single bad AI engagement can drain the entire reserve in a single magazine. The mechanics are documented in detail in the BRM5 Vehicle Guide Video, which breaks down price points and the way repair costs scale with damage tier.
Acquisition Price and Cost Per Sortie
Community testing pegs the Stryker's base price at roughly 2.4x the humvee and 3.1x the jeep, which puts it firmly in the late-mid-game bracket. Fuel runs the engine dry about every 18 minutes of active driving, and a full repair after a major engagement costs about a third of the vehicle's purchase price. The math is brutal on paper, but the XP return from a single gunner-seat sortie can offset the cost when the crew is running a tight route.
| Cost item | Stryker | Humvee | Jeep |
|---|---|---|---|
| Base price | High | Medium | Low |
| Fuel per hour (active driving) | ~3.3 units | ~2.1 units | ~1.4 units |
| Full repair (after major damage) | ~33% of buy price | ~20% of buy price | ~15% of buy price |
| Break-even sortie count (solo, no crew bonus) | 4-5 | 2-3 | 1-2 |
Fuel, Repair, and Ammo Field Mechanics
Stryker fuel management is the most common rookie mistake. The gauge in the cab is generous, but the engine draws harder than the humvee's at idle, especially when the turret is tracking targets. Players who idle the engine while lining up turret shots burn fuel without gaining XP, which is why experienced crews shut the engine down during static fire missions and restart only for repositioning.
Repair kits stack, and a single high-tier kit can fix roughly 60% of the Stryker's total health when applied at a friendly base. Ammo resupply for the turret is the hidden cost nobody talks about: turret belts run dry faster than personal weapons, and resupplying mid-sortie is only possible at a friendly spawn or with a passenger who is willing to leave the vehicle.
When to Skip the Stryker and Use a Humvee
The humvee is the right call for short scouting runs, quick medical evacuations, and any engagement where speed matters more than sustained fire. If the route is under 10 minutes and the threats are light infantry, the humvee's lower fuel draw and faster handling will save money. The Stryker is the right call when the engagement is expected to last longer than 15 minutes, when AI armor or fortified positions are involved, and when you have a crew that can rotate seats.
Air Support: Comparing the Stryker to brm5 Helicopters
The Stryker's strongest selling point on the ground becomes a weakness the moment you stack it against the brm5 helicopter roster. A crewed APC cannot cross water, cannot insert into rooftop objectives, and cannot reposition across the entire map in under two minutes. If the mission calls for vertical mobility, the brm5 helicopter line is the right tool, and the Stryker should stay parked.
brm5 Best Helicopter: Sea Stallion and CH-53D
When players ask about the brm5 best helicopter, the answer depends on the mission profile, but two airframes dominate the community ranking. The brm5 sea stallion is the heavy lifter: it can carry a full Stryker crew plus their gear, sling-load the APC itself in some mission types, and ferry a squad across the entire map in one flight. The brm5 ch53 is the same airframe family with a different loadout tuning, trading some lift capacity for a more responsive flight model that veteran pilots prefer for precision insertions.
| Aircraft | Crew seats | Lift capacity | Best mission | XP for pilot |
|---|---|---|---|---|
| Light scout heli | 2 | Low | Recon, fast response | Medium |
| Medium utility | 3 | Medium | Squad transport, light cargo | Medium-High |
| brm5 sea stallion | 4+ | High | Heavy lift, vehicle transport | High |
| brm5 ch53 | 4+ | High | Precision insertion, sling load | High |
Air-to-Ground Pairing Tactics
The strongest late-game combos pair a Stryker with a CH-53D or Sea Stallion on the same sortie. The heli flies the crew to a forward operating base near a hot objective, the Stryker rolls off the ramp, and the heli loiters overhead to provide overwatch and emergency extraction. This pattern nets roughly 40% more XP per hour than running the Stryker from a fixed base, according to community testing on the network-issues-patch branch.
The pairing also solves the Stryker's worst weakness, which is its long startup and shutdown cycle. Instead of driving the APC for 20 minutes, the heli compresses the transit time to under three minutes, and the Stryker spends almost the entire sortie in active turret coverage.
When a Humvee and a Heli Beats a Stryker Solo
If you have a friend online and no Stryker crew available, the more efficient setup is often a humvee plus a scout helicopter. The humvee handles the ground XP loop while the heli provides mobile overwatch and rapid repositioning. The combined fuel and repair cost is lower than a Stryker, and the XP split is more flexible because each player can specialize in their own role.
For pilots who prefer the pure brm5 helicopter experience over crewed vehicles, the brm5 best loadout guide maps out optimal SMG and LMG pairings for solo runs, including ammo-conversion breakpoints, suppression thresholds, and per-tick XP rates that compound during long extraction routes. Pairing the minigun-equipped scout with a secondary SMG (instead of dual LMGs) keeps weight under the brm5 helicopter handling threshold while still hitting the 4,200 XP-per-extraction soft cap that squad vehicles typically require three players to match.
Combat Tactics, Engagements, and When to Bail Out
The Stryker is durable but not invincible, and the gunner seat becomes a liability when AI threats close inside the turret's dead zone. Knowing when to hold position and when to bail is what separates a profitable sortie from a totaled APC and a long walk home.
Holding a Turret Position vs. Repositioning
A static turret position is the highest-XP stance because the gunner can track targets without the driver fighting the steering. The downside is that AI anti-vehicle teams will eventually flank the position and hit the Stryker from the rear arc, where the turret cannot return fire without a 90-degree turn that takes 2-3 seconds. Experienced crews rotate the Stryker 45 degrees every two minutes to keep the rear arc covered by the turret's wide tracking cone.
Repositioning is the right call when the AI spawn rate spikes, when friendly infantry is in danger of being overrun, or when the fuel gauge drops below a quarter tank. The brm5 jeep and humvee are faster at repositioning, so the Stryker should never try to outrun a threat. Instead, the driver should pick a fallback route that ends at hard cover and a turret-down defensive angle.
Ammo, Health, and Bail-Out Thresholds
| Status | Turret | Drive train | Recommended action |
|---|---|---|---|
| Green | Full | Full | Hold and farm |
| Yellow | Half | Light damage | Reposition, consider resupply |
| Orange | Low | Moderate damage | Bail to infantry, repair at base |
| Red | Empty | Critical damage | Abandon vehicle, regroup |
The bail-out threshold is earlier than most players expect. A Stryker that has taken three or more AI anti-vehicle hits is one more magazine away from a total loss, and a totaled APC costs more to replace than the XP it generated during the sortie. Cutting losses at orange status preserves the crew and the vehicle for the next run.
Counter-Engagement: What Kills a Stryker Fast
AI rocket teams, emplaced heavy machine guns, and any vehicle armed with an anti-armor round can disable a Stryker in two to three hits. The brm5 helicopter line is the only airframe that can reliably destroy a Stryker from above, which is why running an APC without air support in contested airspace is a gamble. Players who fly the brm5 sea stallion or ch53 for overwatch can call out flanking rocket teams before they get a shot off, and that single coordination is the difference between a 15-minute sortie and a 40-minute recovery mission.
Frequently Asked Questions
What is the brm5 Stryker guide's main takeaway for new crews?
The Stryker is a crew-served turret platform, not a fast transport. A focused brm5 Stryker guide approach puts a dedicated gunner in the turret, a driver on route planning, and a passenger on resupply duty. This crew setup generates roughly 2.3x the XP of a solo pilot by keeping the turret active without seat-swap reload penalties.
How does the Stryker compare to the brm5 humvee and brm5 jeep?
The humvee is faster and cheaper, the jeep is the lightest recon option, and the Stryker sits above both as a sustained-fire gun truck. Choose the humvee for short scouting runs under 10 minutes, the jeep for solo insertion tasks, and the Stryker for engagements longer than 15 minutes with a crew that can rotate seats.
Is the brm5 sea stallion or the brm5 ch53 the best helicopter for Stryker support?
The brm5 sea stallion is the heavy lifter for vehicle transport and large crews, while the brm5 ch53 is the precision-insertion variant with a more responsive flight model. For pure Stryker support, the Sea Stallion wins on lift capacity; for fast sling-load retrievals and rooftop insertions, the CH-53D is the stronger pick.
Can I run a brm5 Stryker sortie solo without burning through fuel?
Yes, by parking at a hard-cover overlook, shutting the engine down, and farming the gunner seat while clearing close infantry on foot. The southern airfield and coastal radar station both spawn predictable patrol arcs, and a solo gunner can clear three to four patrols before needing to refuel. Pair the run with a brm5 helicopter overwatch if you want to skip the long drive back to base.